The day we found out I was pregnant with my angels we were thrilled and we started calling them Prince A~Prince B & Princess C! To us they were the most important people in the world and the greatest & most wonderful Gifts from GOD! They were ROYALTY! If you have been following me you will know that I have a huge collection of crowns all for the angels~
Since I decorated their bedrooms in a "royal" theme I thought it would be great to have different headboards other than the crib headboards we had, but I did not want to spend a lot of money since I tend to change decor often. My husband is in the real estate development business & when I would go to his office I noticed he had tons of foam core that he uses for projects that is when it hit me! Foam core is easy to cut, so light weight & should it fall, heaven forbid it would not hurt either of my angels. I made these just a few months before I knew what a blog was.
Here is the process I used to make them~
First I started by cutting the foam core I used a huge clock (now a chalk board) I have to make the circular part I then covered it with an Ikea duvet insert~
I hot glued the insert and the fabric. Oh by the way I actually used drapery blackout fabric, like all fabric it has two sides ha-ha one side feels like fabric and the other side looks & feels like plastic it kind of has a sheen to it. I used the side that has a bit of sheen on the outside. I used this side because I knew it wold be easy to wipe off should it get stained~
This is what it looks like when I finished doing the first glue down. I needed to do some fine tuning to make it taut~
I could not wait to see what it would look like in the angels bedroom. I bought the beautiful crown at Hobby Lobby~
As you can see I was not able to get it completely smooth, but I knew that the next step would pull it to look smooth~
Guess what I used? Come on guess~
If you guessed brads then you are so correct! Yea, for you. I bought these at a great price as I was needing tons I hit the jackpot. I knew I could not leave them as is so this is what I did~
I gave each & everyone of these brads a key so that I could paint them with oil rubbed bronze spray paint. I stuck them into a pool noodle that I cut and painted them~
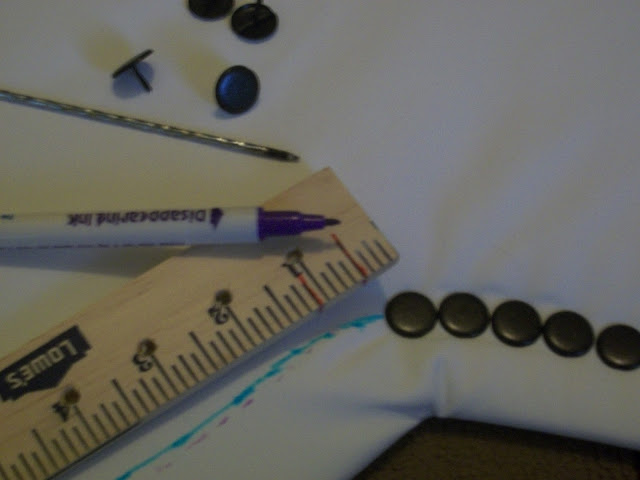
I measured 4 inches down from the top & drew a line with a sewing pen (so I can erase it once I was done (with water)) I then measured a brad for spacing purposes (see the red lines) & placed the brads accordingly~ Don't they look perfect?
I thought I should take a picture to show you what it looks like once it is all done. I hot glued all of the brads so that the angels would not be able to remove them & to attach the crown I used some fishing line & glue, you can see from this picture I need to re inforce the crown with probable some buttons to keep the angels from pulling it off as this one is!!
This is the first one I made. Notice that the demilune is larger in one of them~
I took this picture because it was stained & I wanted to show you before & after pictures of how easy it s to wipe off the stain with a little peroxide & rag~


